EmuBoost
Table of contents
Setting up the VTx in EmuFlight (No VTx Tables) (EmuFlight 0.X)
Note: EmuFlight does not use VTx tables (just like BetaFlight before 4.1.0). Instead VTx settings are changed via Smart Audio/ IRC Tramp using CLI commands, OSD commands, or pushing buttons on your VTx.
Ensure that your VTx has been connected to your flight controller with an appropriate UART. If you are installing EmuFlight from a build that previously had BetaFlight installed, it is useful to save a copy of your dump/diff, or to take a screenshot of your BetaFlight ports tab before flashing EmuFlight. From your BetaFlight dump/diff, you can copy the serial information from the # serial section into the EmuFlight CLI and save.
Example of CLI Serial code from your Dump/Diff:
serial 3 2048 115200 57600 0 115200
On a clean build, you need to select the correct UART your VTx is connected to and proper Peripherals (TBS SmartAudio or IRC Tramp). In the example shown, the Smart Audio wire from the VTx has been attached to the TX pad of UART3. 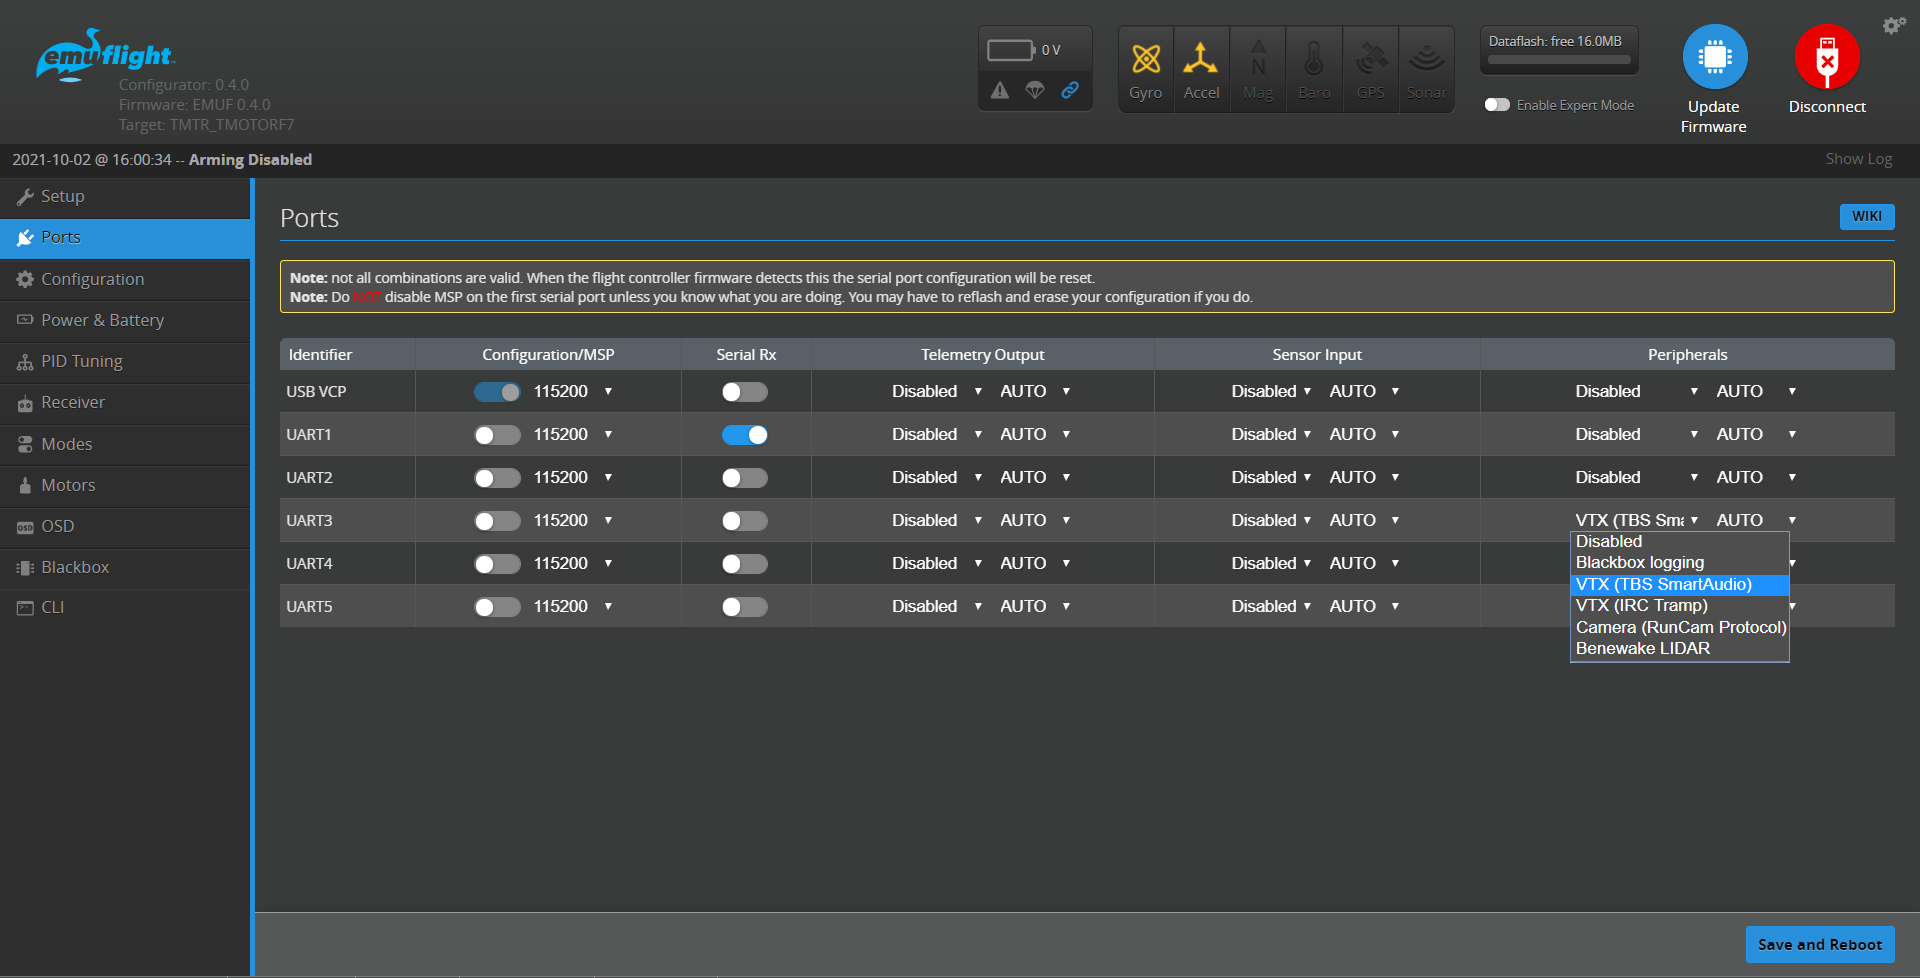
Save and Reboot and you are done setting up the Smart Audio or IRC Tramp. (Note, not all VTx use TBS Smart Audio protocol, even though they say they are Smart Audio capable. In situations where everything is connected correctly and you still cannot get VTx settings to work, try switching to IRC Tramp in your Peripherals.)
CLI Commands
You can control the VTX settings using CLI commands. Type GET VTX or SET VTX in the CLI tab and you will see all the current VTX settings. 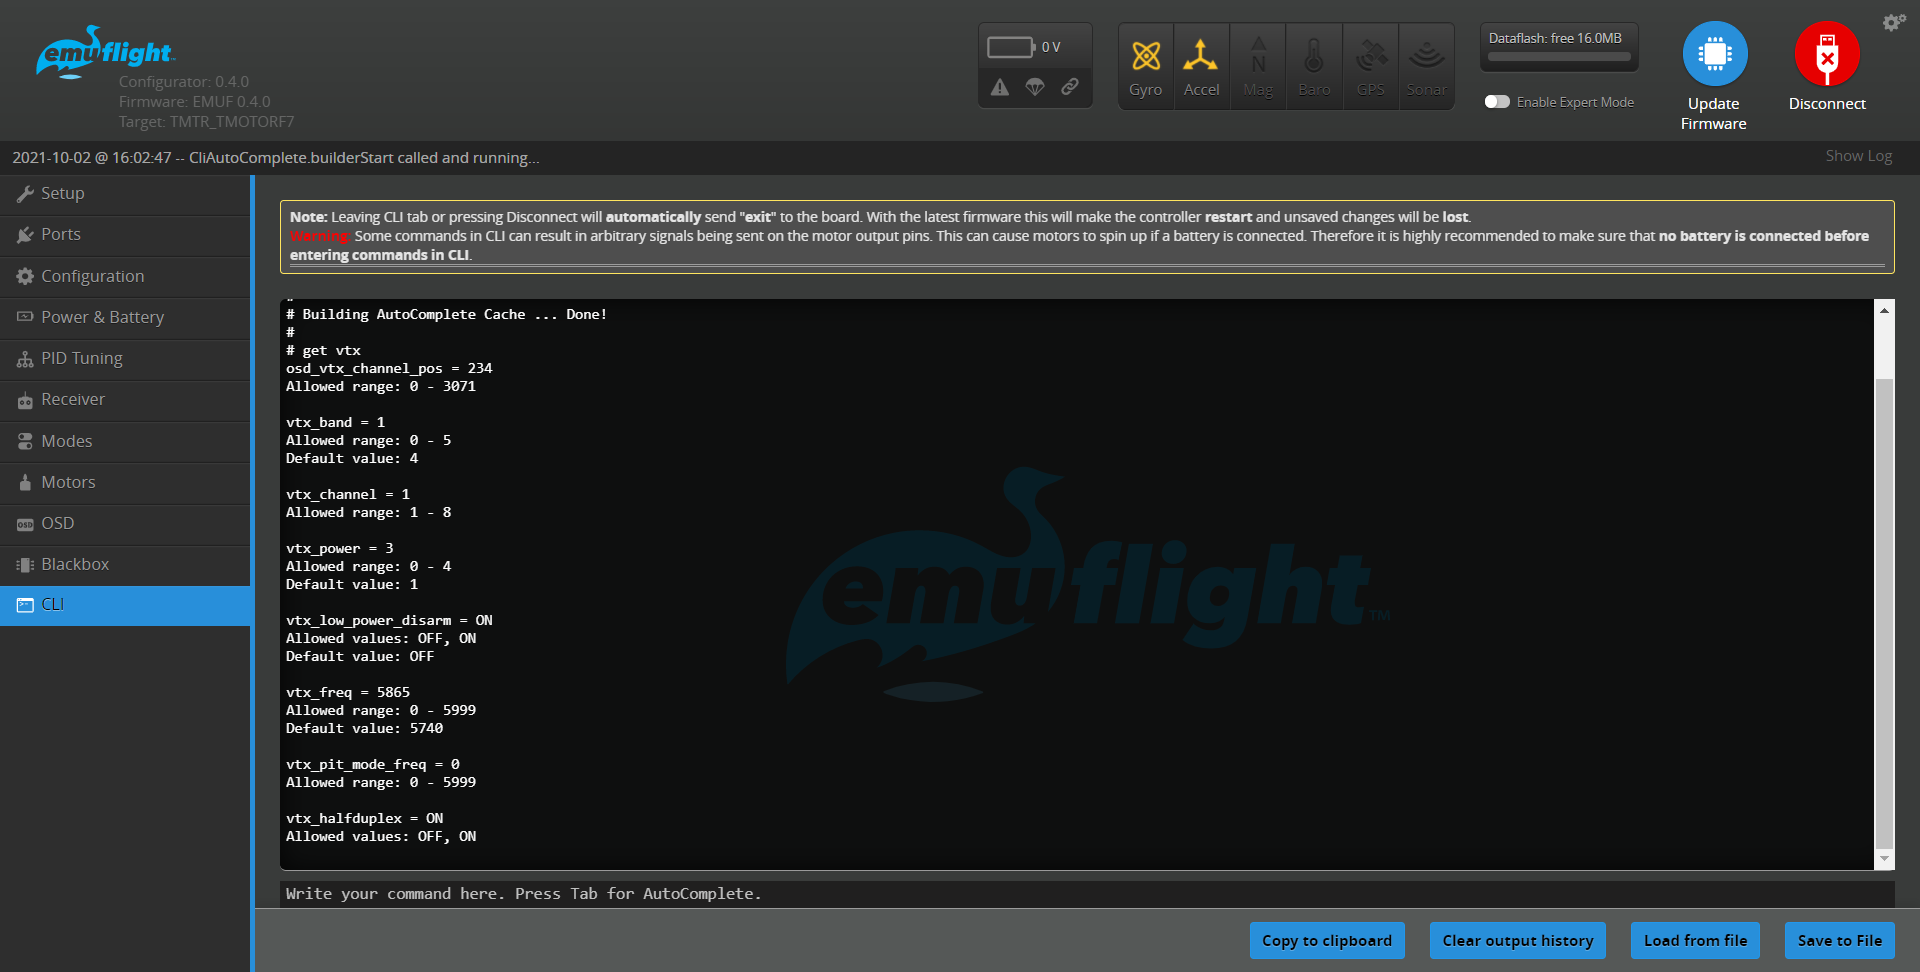
Available VTx CLI commands:
vtx_band =
Allowed range: 0 – 5

vtx_channel =
Allowed range: 1 – 8

vtx_power =
Allowed range: 0 – 4

vtx_low_power_disarm =
Allowed range: ON|OFF   #Sets the lowest power level while disarmed

vtx_freq =
Allowed range: 0 – 5999
For example, to configure the VTX to use band R and channel 3 (5732 MHz), enter the CLI and input:
set vtx_band = 5
set vtx_channel = 3
set vtx_freq = 5732
save
VTx Power Level
VTx power (level 0 - 4) corresponds with the 5 set power levels of most VTx available. A power level of 0 will be Pit Mode, a power level of 1 will be the lowest power (25mw), and each power level will increase with 4 being the highest. If the VTx comes with fewer than 4 power levels, the remaining vacant levels will correspond with the previous highest mW level. For example, a VTx with PIT/25/200/500/800/mW listed:
| CLI VTx Power | 0 | 1 | 2 | 3 | 4 |
| Transmitter Power | PIT | 25mW | 200mW | 500mW | 800mW |
:arrow_up: Typing SET VTX_POWER = 3 will set your VTx at 500mW.
For a VTx with PIT/25/200/600/mW listed: | | | | | | | |:–|:-:|:-:|:-:|:-:|:-:| | CLI VTx Power | 0 | 1 | 2 | 3 | 4 | | Transmitter Power | PIT | 25mW | 200mW | 600mW | 600mW |
:arrow_up:Typing SET VTX_POWER = 3 or 4 will set your VTx at 600mW.
For a VTx with only 25mW power output (like on whoops): | | | | | | | |:–|:-:|:-:|:-:|:-:|:-:| | CLI VTx Power | 0 | 1 | 2 | 3 | 4 | | Transmitter Power | PIT | 25mW | 25mW | 25mW | 25mW |
:arrow_up: Typing SET VTX_POWER = 1 through 4 will set your VTx at 25mW.
(However, some real world testing has shown that setting higher power levels on a single power VTx may result in higher mW output. This can increase your video range, but may also shorten the life of your VTx. Play with at your own risk.)
[Note: VTx with more than 5 power levels (>pit+4) cannot be set up with CLI at this time and will need to be set with the buttons on the VTx using manufacturer documentation. If operating via the VTx buttons, it may be necessary to disable Tramp on the Ports tab to prevent conflicting settings being sent from FC to VTx upon booting of aircraft.]
Lowest Power While Disarmed
Setting the vtx_low_power_disarm = ON can be useful for higher power output VTx. This setting lowers the VTx power output to the lowest power (25mW) while the aircraft is disarmed. This can prevent overheating the VTx while working on the bench, before arming, or after a landing. This can also reduce power consumption while not in flight.
Note: this setting does not affect the power output in the case of the disarm after a receiver-failsafe has occurred. In this case the output power will not be lowered.
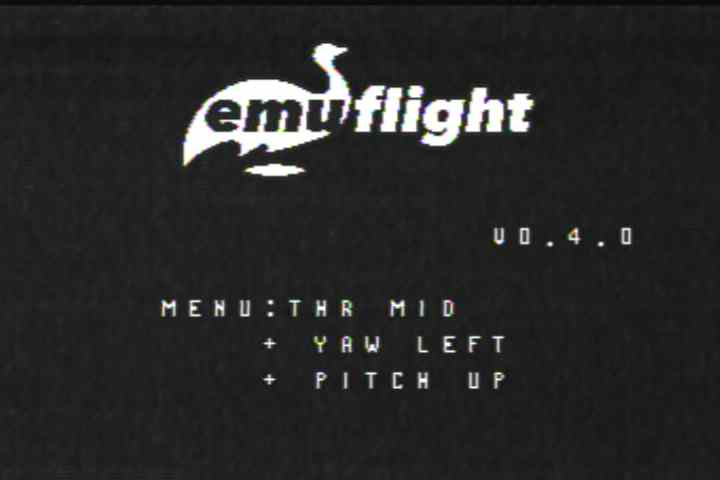
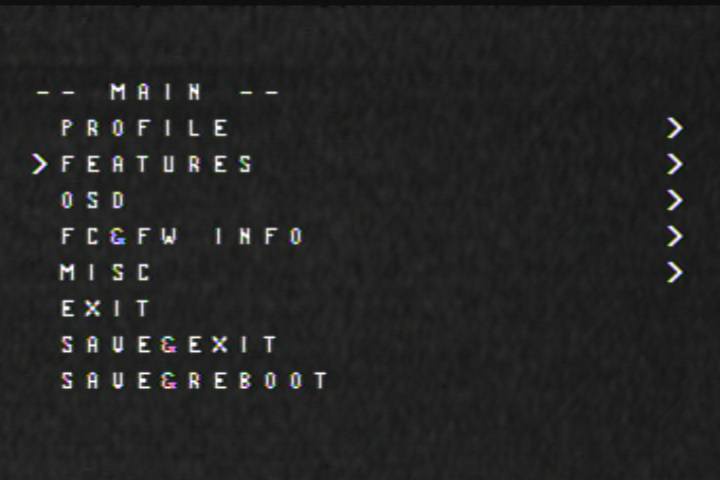
EmuFlight OSD
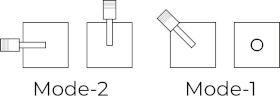
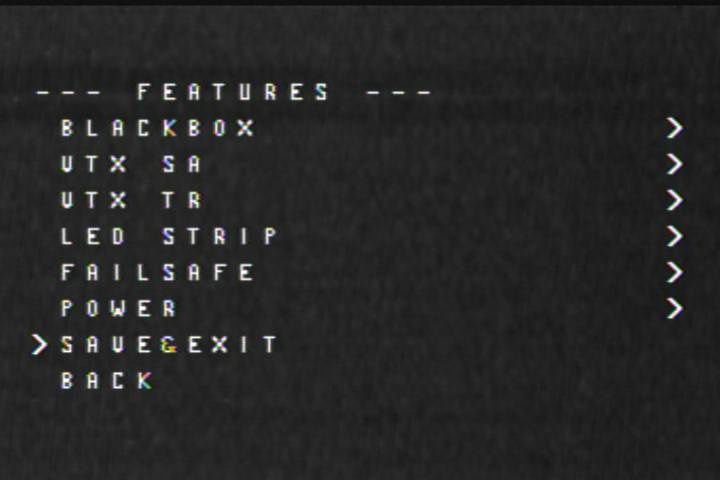
VTX settings can be controlled from EmuFlight OSD. To enter the Menu (Mode2), move the Throttle to Middle, Yaw to the Left and push the Pitch stick Up, while the quadcopter is disarmed.
Select Features menu.
Then VTX SA (Smart Audio).
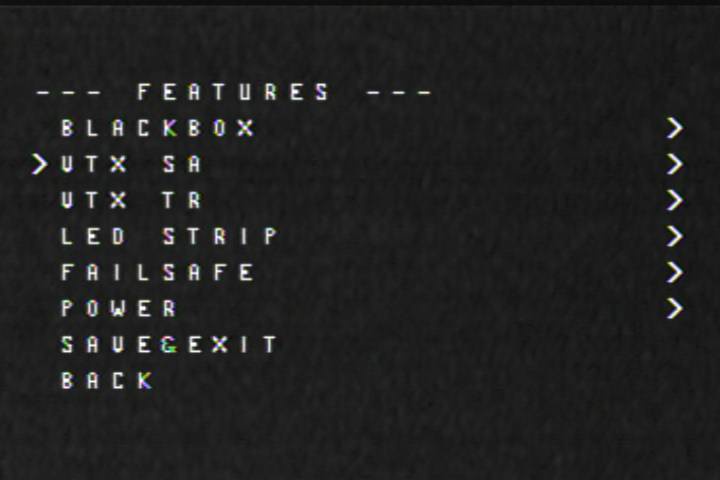
Or VTX TR (IRC Tramp).
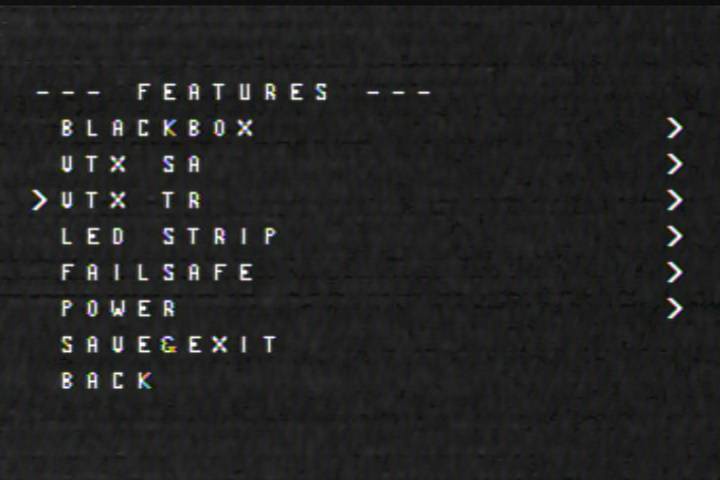
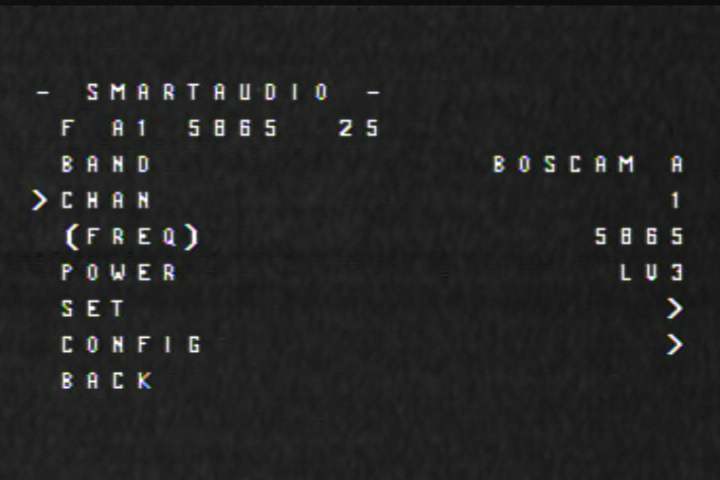
You can change the Band, Channel, Power output level in the menu.
Smart Audio
IRC Tramp
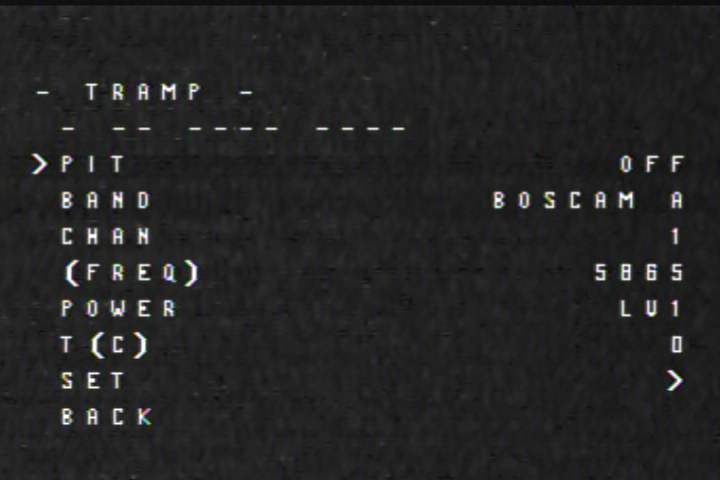
Configuration changes are committed to the VTX only after the confirmation SET > YES.
Smart Audio / IRC Tramp
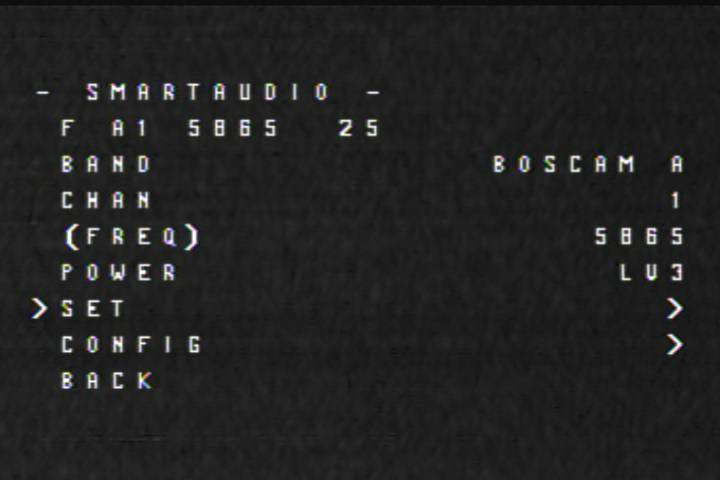

SAVE & EXIT. (Note: Sometimes it is necessary to unplug/replug battery for changes to take effect.)
Special thanks to [Montis at MultiRotorGuide.com]((http://www.multirotorguide.com/guide/guide-smartaudio-vtx-control-and-how-to-set-it-up/).
by @BeauBrewski